Google Ad Manager Admin is responsible for overseeing and managing the advertising operations within the Google Ad Manager platform. This role involves setting up ad campaigns, monitoring performance, and optimizing ads to achieve targeted results. Additionally, the admin manages inventory, implements ad trafficking, and ensures compliance with brand safety measures. They work collaboratively with other teams, such as marketing and sales, to align ad strategies with business objectives. Their expertise in analyzing ad metrics and reporting is crucial for making data-driven decisions to enhance ad performance and revenue generation. Would you like more details on any specific aspect of this role?
Overview of Admin in Google Ad Manager
In Google Ad Manager, an admin is a user role assigned to individuals who require full access to the platform’s features and settings. Admins have the highest level of permissions within an ad manager account, allowing them to oversee and control various aspects, including managing other users, adjusting account settings, configuring billing, and accessing all data and reports. This role is crucial for maintaining the overall functionality and efficiency of ad operations, as admins have the capability to make strategic changes that impact ad inventory, campaigns, and monetization strategies.
Admins are also responsible for ensuring that the ad manager account operates in compliance with Google’s policies and best practices. This includes setting up and enforcing access controls, updating security measures, and managing user roles to ensure that team members have the appropriate level of access for their responsibilities. Given the comprehensive nature of their access, admins should be individuals with a thorough understanding of digital advertising, as well as technical proficiency in using the Google Ad Manager platform. If you’re considering who should be an admin in your organization, ensure they have the requisite skills and understanding of your business’s advertising objectives.
Features of the Admin Role in Google Ad Manager
Here’s a table highlighting key features of the Admin role in Google Ad Manager:
| Feature | Description | Benefits |
|---|---|---|
| Full Access | Complete control over all Ad Manager functionalities | Manage and optimize the entire network |
| User Management | Create, edit, and delete user roles and permissions | Ensure proper access control and security |
| Advanced Features | Activate and manage advanced features and settings | Utilize additional capabilities for better performance |
| Order Management | Create, approve, and manage orders | Streamline the order process and maintain the organization |
| Reporting | Generate comprehensive reports on performance and inventory | Make data-driven decisions and improve strategies |
| Policy Violations | View and resolve policy violations | Maintain compliance and network integrity |
| API Access | Manage API access and permissions | Integrate with other systems and automate processes |
Managing Settings in Google Ad Manager (GAM)
Let’s go through these components of Google Ad Manager:
Global Settings in Google Ad Manager refers to the overarching configurations that affect your entire account. This includes setting time zones, currency preferences, managing permissions for users, and configuring network settings that apply across all campaigns and ad units. It’s critical for consistent ad management and reporting.
Ads.txt Management in Google Ad Manager involves creating and maintaining the ads.txt file, which helps combat ad fraud. This file lists authorized sellers of your ad inventory. Proper management ensures transparency, maintaining the integrity of your ad supply chain by only allowing authorized parties to sell your digital ad space.
Access & Authorization in Google Ad Manager involves setting permissions for users to control who can view, edit, or manage different parts of your account. This includes defining roles and access levels to ensure security and organizational efficiency, allowing users to perform tasks specific to their responsibilities.
Linked Accounts in Google Ad Manager allows integration with other Google services like Google Analytics, AdSense, and Google Ads. This linking facilitates data sharing and reporting, offering a comprehensive view of ad performance across platforms. By connecting accounts, you streamline campaign management, enhance targeting capabilities, and make data-driven decisions to optimize ad strategies and maximize revenue.
Delivery in Google Ad Manager refers to the process of serving ads based on specific criteria like targeting settings, pacing, and priorities. It ensures the right ads reach the right audience at the right time, managing frequency and optimizing inventory usage. Effective delivery configurations maximize ad performance and fulfill campaign objectives while adhering to advertiser requirements.
Inventory in Google Ad Manager refers to the available ad spaces that can be sold to advertisers. It includes configuring ad units and placements, categorizing them by site sections or formats, to optimize ad delivery and revenue generation effectively across digital properties.
Video and Audio in Google Ad Manager involve managing ad inventory and formats for multimedia content. This includes setting up ad units that support video and audio ads, optimizing for different devices, and ensuring seamless delivery. It enhances audience engagement and expands monetization opportunities for publishers.
Companies in Google Ad Manager represent the advertisers, agencies, or third-party entities you collaborate with for ad sales. Setting up company profiles enables easier management of client relationships, ad orders, and billing. This feature aids in organizing clients, streamlining communication, and efficiently handling ad operations to meet business objectives and client needs effectively.
Change History in Google Ad Manager logs all modifications made within your account. It tracks changes to campaigns, inventory, users, and settings, providing detailed information on what was altered, when, and by whom. This helps in troubleshooting, ensures accountability, and maintains transparency for account management and audit trails.
Policy Center in Google Ad Manager helps publishers manage ad policy compliance. It provides insights into any issues affecting ad serving, such as violations of Google’s ad policies. Publishers can view detailed reports, understand problem areas, and find guidance for resolving issues to ensure their inventory stays compliant, minimizing disruptions to ad delivery and revenue generation.
Multiple Customer Management in Google Ad Manager streamlines handling several client accounts through a single interface. It allows agencies and large publishers to efficiently oversee numerous ad operations, simplifying tasks like billing, reporting, and account maintenance. This centralized management enhances operational efficiency, ensuring consistent performance and compliance across all managed accounts.
Managing Clients with Google Ad Manager Accounts
Managing clients and campaigns using Manager Accounts in Google Ad Manager involves several steps to ensure efficient organization, oversight, and reporting. Here’s an outline of what you need to do:
- Set Up a Manager Account:
- If you haven’t already, create a Manager Account in GAM to centralize control over multiple client accounts.
- Linking Client Accounts:
- Use your Manager Account to link existing Google Ads accounts or create new ones for your clients. You’ll need the client’s account ID or the ability to create accounts directly.
- Organize Accounts:
- Group your client accounts under your Manager Account in a way that helps you track and manage them easily, possibly by industry, region, or service type.
- Access & Permissions:
- Ensure correct access levels for your team members and clients. You can assign roles such as admin, standard, or read-only.
- Campaign Management:
- Create and manage campaigns directly from your Manager Account. Implement strategies like ad scheduling, targeting, and budget allocation to optimize performance.
- Regularly review and adjust ad copy, keywords, and targeting to meet client goals.
- Reporting:
- Utilize Google Ads’ reporting tools to generate performance reports. Customize these reports to highlight metrics that matter to each client (e.g., impressions, clicks, conversions).
- Billing Management:
- Use the Manager Account’s billing consolidation option to streamline invoicing processes. Review and know the billing cycle to manage client expectations.
- Optimization & Insights:
- Analyze data to provide insights into campaign performance and areas for improvement. Run A/B tests to enhance ad effectiveness.
- Compliance and Policies:
- Ensure all campaigns adhere to Google Ads policies and any legal regulations related to advertising.
Guide to Accessing Google Ad Manager Features
To access Google Ad Manager features and settings, you’ll first need to have a Google Ad Manager account. Once you have your account ready, start by logging in at admanager.google.com using your credentials. After logging in, you’ll land on the Ad Manager homepage, where you’ll find the main dashboard, navigation menu, and key metrics summaries.
The navigation menu, typically on the left side of the screen, allows you to access different features and settings. For instance, to create or manage ad inventory, navigate to the “Inventory” section where you can organize ad units and placements. Under “Orders” or “Line Items,” you’ll find options to create and manage sales orders and line items which control ad delivery.
For settings, go to the “Admin” section. Here, you can configure user roles and permissions, set up payments, and manage account settings. You’ll also find integration options and access to Google’s support resources, should you need further assistance.
FAQs on Google Ad Manager Admin Settings
Here are some frequently asked questions (FAQs) about Google Ad Manager Admin Settings:
You can create and manage user accounts and assign different roles or permissions to control access to various features within Google Ad Manager.
Navigate to the Inventory section, where you can define the ad unit size, name, target window, and other settings for new ad units.
In network settings, you can configure currency, time zone, and manage labels and creative templates that apply to your entire network.
You can create orders and line items under the Orders tab, specifying the advertiser, targeting criteria, and delivery settings.
Invoicing and payments can be managed under the Admin section, where you can set your billing profile and payment methods.
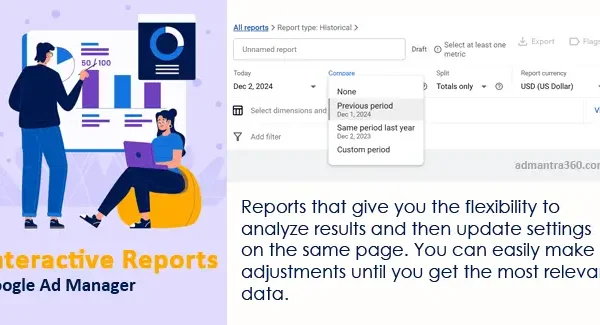
Use the Reports tab to create customized reports to analyze performance metrics, such as impressions, clicks, and revenue.